In today’s digital age, having a reliable method to install or reinstall your operating system is essential for maintaining a smooth computing experience. Whether you’re upgrading to Windows 11 or reverting back to Windows 10, creating bootable media can save you time and frustration. This guide will walk you through the straightforward process of preparing a bootable CD, DVD, or USB drive, ensuring you have everything you need for a clean installation. With just a few simple steps, you’ll be equipped to tackle any installation need, making your tech journey more efficient and hassle-free.
| Step | Windows Version | Method | Details |
|---|---|---|---|
| 1 | Windows 11 | Media Creation Tool | Download the tool, select language and edition, plug in 8GB USB, and follow prompts. |
Creating Bootable Windows Media Easily
Making bootable media for Windows is simpler than you might think! You can use the Media Creation Tool from Microsoft, which guides you step-by-step in creating a USB or DVD. This tool is user-friendly and helps download the necessary files directly to your media. Just remember to have a USB flash drive ready, as it needs to be at least 8GB for Windows 11 and 4GB for Windows 10. This is a great way to prepare for a fresh Windows installation!
If you prefer, you can also create bootable media by downloading an ISO file. An ISO file is like a package that contains all the installation files. You can burn this ISO onto a USB drive or DVD using special software. This method may take a little longer, but it gives you control over the installation process. Whichever method you choose, having a bootable media set up is essential for installing or reinstalling Windows smoothly.
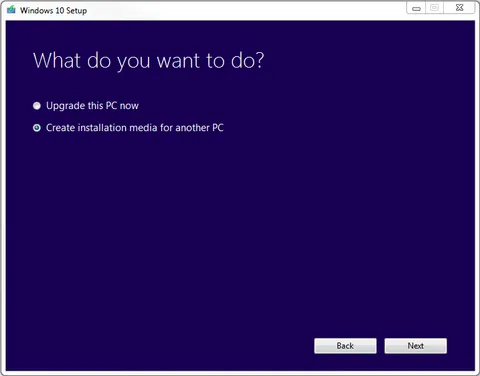
Step-by-Step Guide to Creating Windows Installation Media
To create a bootable USB drive for Windows, first, download the Media Creation Tool from the official Microsoft website. After downloading, run the tool and follow the prompts to select your preferred language and edition. Make sure your USB drive is connected, as you will need to choose it in the next steps. The tool will then download Windows files and write them to your USB drive automatically, making it ready for installation!
If you’re looking to create a bootable DVD instead, you can still use the Media Creation Tool to download an ISO file. Once you have the ISO, right-click it and select ‘Burn disc image’ to copy it onto a DVD. This option is great if you prefer using DVDs or if your computer has a DVD drive. After burning, the DVD will be ready to use for installing Windows on any compatible computer.
Tips for Using Your Bootable USB or DVD
Once you have your bootable USB or DVD ready, the next step is to change your computer’s boot order. This ensures your computer reads the USB or DVD first when you start it up. You can usually change the boot order in the BIOS settings. Restart your computer and look for a message that tells you which key to press to enter setup. Once you’re in, navigate to the boot menu and set your USB or DVD as the top priority.
After changing the boot order, save your settings and restart your computer. If everything is set up correctly, you will see the Windows Installation Wizard appear on your screen. Follow the on-screen instructions to proceed with the installation. Remember, this process can take some time, so be patient. Once completed, you’ll have a fresh installation of Windows ready to use!
Understanding Windows Installation Media Options
When preparing to install Windows, it’s essential to understand the different types of installation media available. You can create either a USB drive or a DVD, each with its own advantages. USB drives are often preferred due to their speed and ease of use, while DVDs may be a better choice if you don’t have access to a USB port or prefer physical media. With the right tools, creating these media options can be a straightforward process.
Each method of installation media creation has its unique steps, but the core principles remain the same. Whether you are using the Media Creation Tool or burning an ISO image, the goal is to ensure that the media is bootable. This means that your computer can recognize it during startup, allowing you to initiate the installation process smoothly. Understanding these options can help you choose the most suitable method for your needs.
Troubleshooting Installation Media Issues
Creating bootable media isn’t always a smooth process, and users may encounter various issues along the way. For instance, if your USB drive isn’t recognized during boot, it may be due to incorrect formatting or a failure in the creation process. Ensuring that the USB is formatted to FAT32 and that you’ve followed each step correctly can often resolve these issues. Additionally, some BIOS settings may need adjusting to prioritize USB booting.
If you experience errors while using the Media Creation Tool, like download interruptions or compatibility issues, checking your internet connection and ensuring your system meets Windows requirements can be helpful. It’s also advisable to use the latest version of the tool available from Microsoft, as updates can fix bugs and improve functionality. Being aware of these common problems and their solutions can save time and frustration.
Best Practices for Creating Bootable Media
To ensure a successful installation, certain best practices should be followed when creating bootable media. First, always use a reliable USB drive or DVD that is free from any defects. A corrupted drive can lead to incomplete installations, so testing the media before use is essential. Additionally, keeping a backup of your important files elsewhere can prevent data loss if something goes wrong during the process.
Another best practice is to keep your installation media updated. Microsoft frequently releases updates and patches for Windows, and having the latest version ensures that you are installing software with the most recent security features and improvements. Regularly check the official Windows download page to verify that you have the latest ISO or Media Creation Tool version, which can enhance your overall installation experience.
Exploring Alternative Software for Bootable Media Creation
While Microsoft’s tools are popular for creating bootable media, several alternative software options are available. Programs like Rufus and UNetbootin offer additional features and flexibility for users who might need different configurations. For instance, Rufus provides options to partition the USB drive and can create bootable media from a variety of image formats, making it a versatile choice for tech-savvy users.
Using alternative software can also simplify the process for users who find the official tools cumbersome. Many of these programs come with user-friendly interfaces and step-by-step wizards that guide you through the creation process. Exploring these options can empower users to create bootable media that meets specific needs, such as multi-boot setups or advanced partitioning, thus enhancing the overall user experience.
Frequently Asked Questions
What is a bootable CD/DVD/USB and why do I need one for Windows?
A **bootable CD/DVD/USB** is a special disc or drive that helps you install Windows on your computer. You need it to **start the installation process** and set up Windows from scratch.
How do I create a bootable USB for Windows 11?
To create a bootable USB for **Windows 11**, download the **Media Creation Tool** from Microsoft, plug in your USB (8GB minimum), and follow the instructions to prepare it for installation.
Can I use a DVD instead of a USB to install Windows?
Yes, you can use a **DVD** to install Windows. Just download the **ISO file**, then use a computer to burn it onto a DVD, making it bootable for installation.
What should I do if I forgot my Windows product key?
If you forgot your **product key**, you can use a tool called **Magical Jelly Bean KeyFinder** to get it back. You can still install Windows without it, but you’ll need the key to activate.
What is an ISO file and how is it used?
An **ISO file** is a digital copy of a CD or DVD. You can use it to create bootable media for Windows by burning it onto a USB or DVD using special software.
Why do I need at least 4GB on my USB drive for Windows 10?
You need at least **4GB** on your USB drive for Windows 10 because it has to store all the files needed for installation. More space ensures it works properly.
What is Rufus and how does it help with Windows installation?
**Rufus** is a free program that helps you write an **ISO file** to a USB drive. It makes your USB bootable so you can install Windows easily when you start your computer.
Summary
The content explains how to create bootable media for installing Windows 10 or 11, offering two primary methods: using Microsoft’s Media Creation Tool or burning an ISO image. For Windows 11, users can download the Media Creation Tool, connect a USB drive, and follow prompts to create a bootable USB. Similarly, for Windows 10, the process involves selecting options in the Media Creation Tool to either create a USB or download an ISO for burning. Additionally, it provides instructions for burning ISO files onto DVDs and highlights recovery options for lost product keys, ensuring users can successfully prepare for a clean installation.
Leave a Reply